Emulating an iPod Touch 2G using QEMU
In a previous blog post, I described how I managed to get an iPod Touch 1G up and running using the QEMU emulator. While I’m very happy that the emulator runs smoothly overall, its functionality is limited to some stock apps, not all of which are fully functional. Moreover, I received a few questions on whether it would be possible to run third-party apps. Unfortunately, the iPod Touch 1G (and iPhoneOS 1.0) do not come with the App Store or an SDK; thus, the amount of third-party apps that can run on this particular device and OS is limited.
Therefore, I decided to shift focus to emulating an iPod Touch 2G, arguably one of the most popular and iconic iPod Touch devices. This device was also my first Apple product, and it motivated me to pursue iOS development. I targeted iOS 2.1.1, the lowest version of iOS that this device can run. This time, I started by emulating the bootrom and working towards userland emulation and executing SpringBoard, hoping to re-use most of the emulated hardware devices from the iPod Touch 1G. In this blog post, I will describe some challenges I encountered, architectural differences between the iPod Touch 2G and the iPod Touch 1G, and my further plans for emulation. All source code and instructions on how to run the emulator can be found in this GitHub repository.
For reverse engineering and understanding the components, I gratefully used this device tree dump, which has been tremendously helpful.
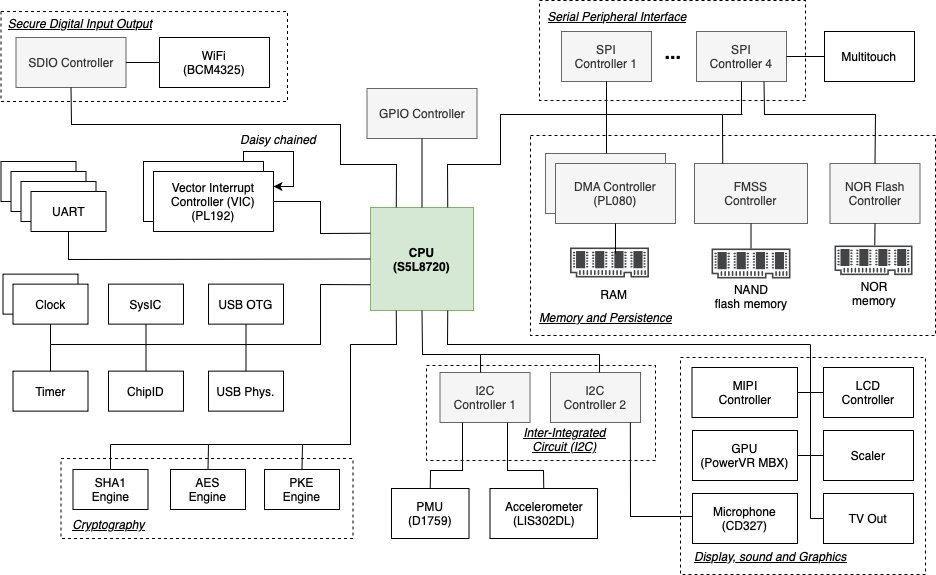
iPod Touch 2G Schematic
For reference, I created the schematic below to show some of the hardware components this device uses and grouped related elements. However, this schematic still needs to be completed since there are some components I still need to start looking at, such as components related to video encoding/decoding. However, I have some QEMU logic for all components in this diagram, and I believe it highlights how complicated these kinds of embedded devices are from an architectural perspective.
The First Steps with SecureROM and LLB
I started by emulating the 240.4 SecureROM bootrom, which I downloaded from here. Similar to the iPod Touch 1G, the iPod Touch 2G uses the ARMv6 instruction set, so fortunately, I didn’t have to make significant changes to the emulated CPU in QEMU. The bootrom puts the device in DFU mode when a particular button combination is pressed or loads the low-level bootloader (LLB) stored on the NOR memory. Here, things started to be different from the iPod Touch 1G.
The first difference is that the iPod Touch 2G has NOR memory accessed through the SPI controller. In comparison, the iPod Touch 1G used CFI flash, the functionality of which was already provided by QEMU. Therefore, I had to reverse engineer the communication protocol with the NOR, which was relatively easy as this protocol is rather straightforward. Its implementation can be found here.
The second, more challenging difference is that the iPod Touch 2G uses the more secure IMG3 file format (instead of IMG2) to store binaries on the NOR/NAND. Luckily, IMG3 has been well-documented, but it involves quite a bit of cryptographic operations, including RSA signatures and hashes to guarantee authenticity and integrity. Since I aim to get an emulator as close to the hardware as possible, I wanted to avoid patching the binaries to turn off signature verification. Therefore, I had to get the PKE engine up and running, which is responsible for modulo arithmetic when verifying RSA signatures. I computed the resulting numbers using OpenSSL’s BIGNUM functionality. Even though my implementation is a bit hacky, it seems to pass the signature verification of all IMG3 images that are loaded.
Some IMG3 images also rely on the UID key, a key unique to each Apple device and fused into the application processor during manufacturing. Since I don’t have access to this key, I generated one myself and used that one when storing IMG3 files on the NOR/NAND. I then define the same key in the AES engine.
I re-used many iPod Touch 1G emulator hardware components, including the timers, clocks, and vector interrupt controllers. It was straightforward to get past LLB as its main responsibility was initializing hardware components and loading iBoot, the main bootloader.
iBoot and the NAND
For several months, I have been stuck in various functions of iBoot. The first challenge came from the LCD, which uses a different underlying communication protocol (MIPI-DSIM) than the iPod Touch 1G. The second challenge, which was much more difficult, was to get the NAND working where iBoot loads the kernel image from. The NAND in the iPod Touch 2G has two main differences from the iPod Touch 1G. First, the NAND driver uses a different communication protocol, referred to as FMSS in the kernel. Second, there were some significant differences in the VFL/FTL specifications, so I had to spend quite some time understanding the mapping function that translates a logical block number to a physical one.
In the iPod Touch 1G and iPhoneOS 1.0, I could easily pass boot args to the kernel. However, Apple has turned off this functionality in production mode for the iPod Touch 2G. Therefore, I had to manually write this string to the appropriate location in kernel memory. There are probably better solutions than this, but some boot flags were necessary to set to get debug output printed to the terminal.
const char *boot_args = "kextlog=0xfff debug=0x8 cpus=1 rd=disk0s1 serial=1 pmu-debug=0x1 io=0xffff8fff debug-usb=0xffffffff";
cpu_physical_memory_write(0x0ff2a584, boot_args, strlen(boot_args));
I also spent quite some effort getting past the kernel image’s signature verification. For some reason, my decryption algorithm does not correctly decrypt the final block when the length of the data is not a multiple of the key size, causing the CRC computation to fail. I am still unsure what I am doing wrong here, but to work around this, I patched the expected CRC code with the code I get during decryption. This workaround correctly validates the kernel image but should still be revised.
Booting the Kernel and SpringBoard
The kernel boots most of the hardware components defined in the device tree. I did not have too many difficulties getting past the initialization of the remaining hardware components. IOKit, Apple’s framework for implementing drivers, is very well-structured, and its debug output makes it easy to identify when and where a driver gets stuck.
When the kernel has booted, it launches launchd, which executes different system daemons, including SpringBoard. The configuration of most of these daemons is located in /System/Library/LaunchDaemons. The iPod Touch 2G has many different daemons, including ones related to media, DNS, FairPlay, and iTunes. To simplify things, I only enabled the necessary daemons to get SpringBoard operational and disabled all others for the time being.
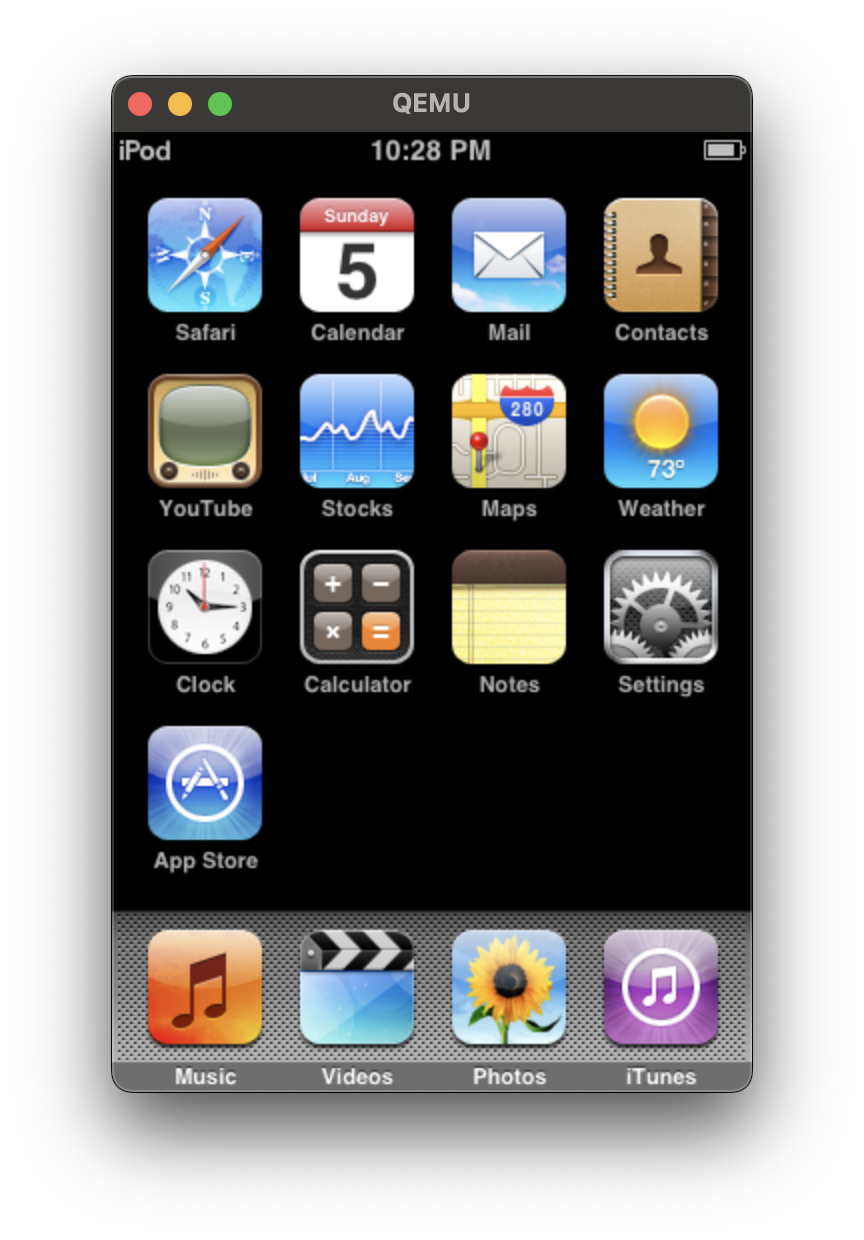
I was very happy that the multitouch driver worked out of the box since I spent quite some time getting it functional for the iPod Touch 1G. With that, I now have a basic iPod Touch 2G emulator!
Working towards WiFi
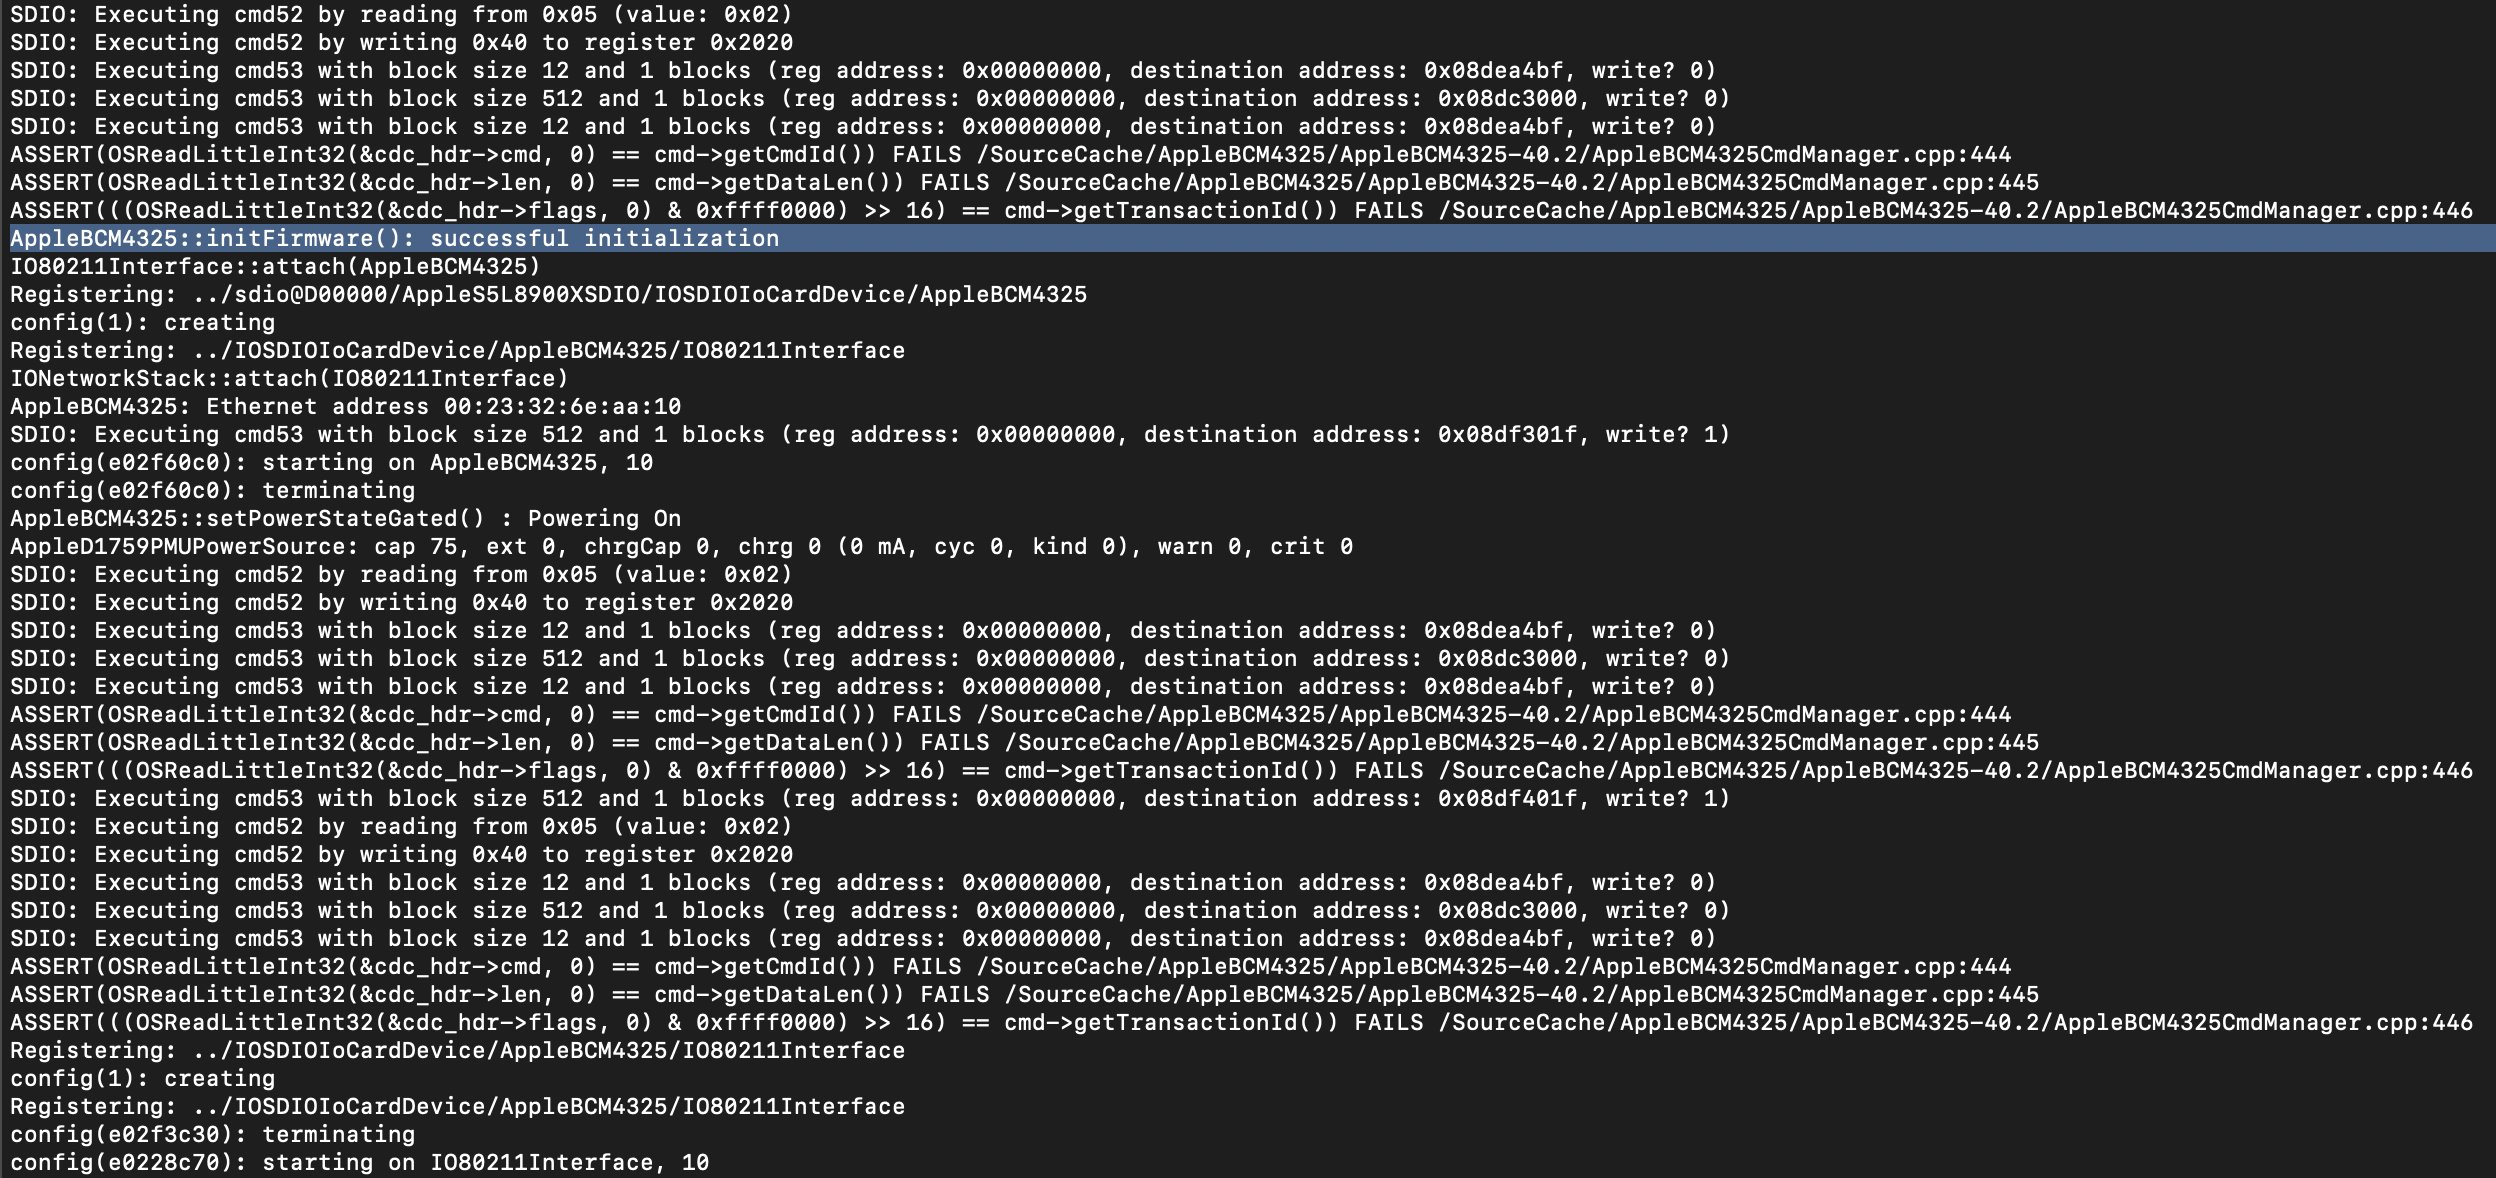
After SpringBoard became operational, I wanted to know how difficult it would be to get the WiFi controller functional. The iPod Touch 2G uses a Broadcom BCM4325, and one can communicate with that device through the SDIO controller. This driver is included in the kernel as a kernel module. I noticed that the kernel would not automatically load the BCM4325 kernel module, and to date, I’m still trying to figure out where and how exactly this module is loaded. To work around this issue, I patched the kernel and added some instructions to load this kernel module manually. Again, it’s not ideal, but at least these drivers are loaded now.
The SDIO standard is well-documented, and it took little time to get that part up and running. The BCM4325 hardware is more complicated, and the iOS kernel uploads a Linux kernel image to the device as part of the boot procedure. The hardware also has many registers, and their content is unclear. However, with some hacking, I could get past the initialization procedure, as seen in the screenshot below. The initialization procedure sometimes hangs, probably because of race conditions or other timing issues. However, full WiFi emulation is far from functional as basic primitives such as SSID scanning or connecting to a network are still not implemented.
Next Steps
I enjoyed working on this next step in emulating legacy Apple devices and improving my understanding of the hardware components in the iPod Touch 2G. I believe the iPod Touch 2G is more stable and easier to work with than the iPod Touch 1G and has quite some potential since it can natively run third-party applications. Below, I list some follow-up steps that would improve the usability of the emulator.
- Running
bashwould make debugging processes, executing applications, and collecting statistics from the device much easier. I have yet to look into this. - I would also like to make installing third-party apps on the emulator much easier, which now requires a full rebuild of the NAND memory.
- Some compilation issues need to be resolved for the emulator to run on other platforms, including Windows and Linux.
- NAND persistence still needs to be fixed, e.g., writes to the NAND are not stored across sessions.
I’m also happy to announce that I will give a talk about this project at FOSDEM’24 in Brussels, also see here. Hope to see you there!
As always, please let me know what you think by opening an issue on the GitHub repository.
Enjoy Reading This Article?
Here are some more articles you might like to read next: